
Sciatica pain—that sharp, radiating discomfort traveling from your lower back down your leg—can disrupt every aspect of your life. For residents in Cedar Park, Leander, and the surrounding Austin area, finding lasting relief is a top priority. While many turn to temporary fixes, targeted stretching offers a powerful, drug-free way to manage symptoms. However, performing the wrong stretches can make the pain worse.
As your trusted chiropractor in Cedar Park, TX, Bell District Spine and Rehab is dedicated to providing safe, effective solutions for back pain and sciatica. This guide details some of the best stretches for sciatica relief, curated by our clinical team to help our community. We’ll explain not only how to perform each stretch but why it works and when professional chiropractic care is the necessary next step for true recovery.
If you’ve been searching for a “sciatica chiropractor near me” in Cedar Park, let this be your first step toward recovery. Whether your pain stems from a disc injury, piriformis syndrome, or spinal stenosis, this guide will help you find relief, backed by the expertise of your local chiropractic team.
1. Pigeon Pose (Eka Kapotasana)
Pigeon pose is one of the most effective stretches for sciatica relief because it directly targets the piriformis muscle. Located deep in the buttock, a tight or spasming piriformis can compress the sciatic nerve, causing pain, tingling, and numbness down the leg. This stretch applies deep pressure to release tension and alleviate pressure on the nerve. For Cedar Park residents who spend hours sitting at a desk or driving, this stretch is especially beneficial for counteracting the chronic hip tightness that contributes to sciatica flare-ups.

This pose is not just for yoga enthusiasts; it’s a prescribed exercise in many clinical settings. We often recommend a modified version to patients at Bell District Spine and Rehab as part of their home care plan, alongside treatments like spinal adjustments and upper cervical care, to improve hip mobility and prevent future pain.
How to Perform the Pigeon Pose
- Starting Position: Begin on all fours in a tabletop position with your hands directly under your shoulders and knees under your hips.
- Leg Placement: Gently slide your right knee forward toward your right wrist. Angle your right shin so your right foot is near your left hip.
- Extend Back: Carefully slide your left leg straight back behind you, keeping your hips square and facing forward. Your hips should be level.
- Hold and Fold: Hold this upright position to feel the stretch. If you can do so without pain, slowly walk your hands forward and lower your upper body down over your front leg.
Clinical Insight: The goal is a deep, releasing stretch, not sharp pain. If you feel a pinching sensation or sharp pain down your leg, ease off immediately. Mild discomfort in the gluteal muscle is expected and indicates the stretch is working.
Tips for Success
- Hold Time: Aim for a 30 to 45-second hold on each side, breathing deeply throughout.
- Modifications: If your hips are tight, place a yoga block or a firm cushion under the hip of your bent leg for support.
- Frequency: Perform this stretch 2-3 times daily, especially after long periods of sitting.
2. Figure-4 Stretch (Supine Piriformis Stretch)
The Figure-4 stretch offers a gentle yet powerful way to relieve sciatic nerve pressure. By targeting the piriformis muscle from a lying-down position, it reduces strain on the lower back, making it an excellent choice for those with acute pain. This stretch is particularly valuable for Cedar Park seniors and individuals with limited mobility who need safe sciatica relief without aggravating underlying spinal conditions like a disc herniation.

This stretch is a cornerstone of chiropractic home care recommendations. At Bell District Spine and Rehab, our chiropractor often suggests it as a safe reactivation exercise and for evening wind-down routines. Its supine nature protects the spine, making it one of the best stretches for sciatica relief when other movements are too painful.
How to Perform the Figure-4 Stretch
- Starting Position: Lie on your back on a comfortable mat. Bend both knees and place your feet flat on the floor, hip-width apart.
- Cross Your Leg: Lift your right foot and cross your right ankle over your left thigh, just below the knee. Keep your right foot flexed to protect your knee.
- Engage the Stretch: Reach your hands through the opening and clasp them behind your left thigh.
- Hold and Deepen: Gently pull your left knee toward your chest until you feel a comfortable stretch in your right glute and hip. Keep your head and shoulders relaxed.
Clinical Insight: To specifically target the piriformis muscle, try to pull the supporting knee toward the opposite shoulder instead of straight toward your chest. This slight angle change can deepen the stretch for more direct relief.
Tips for Success
- Hold Time: Maintain the stretch for 60 to 90 seconds on each side, focusing on deep, relaxing breaths.
- Modifications: If you can’t reach your thigh, loop a towel around it to help you pull.
- Frequency: Repeat this stretch 2-3 times daily, especially before bed to help reduce overnight pain.
3. Hamstring Stretch (Standing or Seated)
A hamstring stretch is fundamental for alleviating sciatica because it targets the large muscles on the back of your thigh. When these muscles are tight, they pull on the pelvis, altering your posture and increasing stress on the lumbar spine. This can irritate the sciatic nerve and cause referred leg pain. For the many Cedar Park and Leander residents who spend much of their day sitting, tight hamstrings are a common and often overlooked contributor to sciatic pain.
We regularly incorporate gentle hamstring stretches into patient care plans at Bell District Spine and Rehab, especially for individuals with disc-related issues or postural imbalances. Its adaptability makes it accessible for nearly everyone seeking back pain relief.
How to Perform the Hamstring Stretch (Seated Variation)
- Starting Position: Sit on the floor with both legs extended straight out in front of you. Keep your back straight.
- Engage the Stretch: Hinge forward from your hips, not your waist, and reach toward your toes. Keep your spine long and avoid rounding your back.
- Hold and Breathe: Reach as far as you can without sharp pain. You should feel a gentle pull along the back of your thighs.
- Repeat: Slowly return to the starting position and relax before repeating.
Clinical Insight: The focus should be a sustained, gentle pull in the hamstring muscle. If you feel sharp, shooting pain down your leg, you are stretching too aggressively. Ease back to a point of mild tension.
Tips for Success
- Hold Time: Aim for a 30 to 45-second hold, focusing on deep breaths.
- Modifications: If you can’t reach your toes, use a towel looped around your feet to gently deepen the stretch without straining your back.
- Frequency: Perform this stretch 2-3 times daily, particularly in the morning and evening.
- Combine for Better Results: For optimal nerve relief, this stretch is powerful when paired with treatments like spinal decompression therapy, which directly addresses pressure on the sciatic nerve.
4. Sciatic Nerve Flossing (Nerve Gliding)
Sciatic nerve flossing, or nerve gliding, is a dynamic movement designed to improve the mobility of the sciatic nerve. Unlike static stretches that hold a muscle, nerve flossing gently mobilizes the nerve, encouraging it to slide more freely through its pathway. This can help reduce irritation, break up minor adhesions, and improve nerve health, which is critical for lasting relief from conditions like sciatica and other disc injuries.
At Bell District Spine and Rehab, we often incorporate nerve gliding into patient care plans for our Cedar Park patients. Addressing the nerve’s mobility directly can resolve chronic or stubborn sciatic pain that doesn’t fully respond to muscle stretching alone, making it a valuable tool in chiropractic care.
How to Perform Sciatic Nerve Flossing (Seated)
- Starting Position: Sit upright in a sturdy chair with your knees bent at 90 degrees and feet flat on the floor. Maintain good posture.
- Initial Movement: Slowly straighten one leg in front of you while flexing your foot (pulling your toes toward you). Only extend as far as you feel a gentle pull.
- Head and Ankle Coordination: As you extend your leg and flex your foot, gently tuck your chin to your chest.
- Reverse the Motion: Slowly lower your leg back to the start. As you do, point your toes away and lift your head to look slightly upward. Repeat this gliding motion.
Clinical Insight: The sensation should be a mild pulling or tingling, not sharp pain. The goal is smooth, rhythmic movement. If you experience a sharp increase in your symptoms, stop immediately and consult with your chiropractor.
Tips for Success
- Hold Time: This is a dynamic movement. Perform 10-15 slow, controlled repetitions on each leg.
- Modifications: If the seated version is uncomfortable, your chiropractor may recommend a variation lying on your back.
- Frequency: Aim for 2-3 sets per day. Consistency is more important than intensity.
- Professional Guidance: Nerve flossing is a precise technique. We recommend learning it under professional supervision at our Cedar Park clinic to ensure correct form and prevent nerve irritation.
5. Seated Spinal Twist (Sukhasan Twist)
The seated spinal twist is a gentle rotational stretch that mobilizes the spine while targeting the hip and gluteal muscles. This stretch is a cornerstone for sciatica relief because it addresses multiple factors at once. By combining spinal rotation with hip mobility, it helps decompress the vertebral joints and release tension in muscles surrounding the sciatic nerve pathway. For desk workers in Cedar Park and Austin, this movement is particularly effective for counteracting the spinal stiffness caused by prolonged sitting.
This stretch promotes spinal health without the aggressive forward bending that can aggravate a sensitive sciatic nerve. At Bell District Spine and Rehab, we often suggest this movement to our patients from Leander and Round Rock as a safe way to maintain spinal mobility between chiropractic adjustments.
How to Perform the Seated Spinal Twist
- Starting Position: Sit on the floor with your legs crossed comfortably. If this is difficult, sit upright in a firm chair with your feet flat on the ground.
- Lengthen Your Spine: Place your right hand on your left knee and your left hand on the floor behind you. Inhale and sit up as tall as possible.
- Initiate the Twist: As you exhale, gently twist your torso to the left. Use your right hand on your knee as leverage, but lead the rotation with your core muscles.
- Hold and Breathe: Turn your head to look over your left shoulder if comfortable. Hold the stretch, breathing deeply. Return to the center and repeat on the other side.
Clinical Insight: The primary goal is to create mobility in the spine, not force a deep twist. The rotation should come from your mid-back. If you feel sharp, shooting pain, immediately reduce the intensity.
Tips for Success
- Hold Time: Aim for a 20 to 30-second hold on each side.
- Modifications: Sitting on a folded blanket can help you maintain a straight spine. If using a chair, you can hold the back of the chair to gently guide the twist.
- Frequency: Perform this stretch 2-3 times per day, especially during breaks from sitting.
6. Prone Hip Flexor Stretch (Modified Lunge)
The prone hip flexor stretch, performed as a modified lunge, is crucial for sciatica relief because it addresses tight hip flexors. These muscles can become shortened from prolonged sitting, a daily reality for many in Cedar Park. This tightness pulls the pelvis forward, increasing the curve in the lower back and placing stress on the lumbar spine and sciatic nerve roots. Lengthening these muscles helps correct pelvic alignment and reduce the mechanical pressure causing sciatica.
This stretch is a fundamental part of postural correction. At Bell District Spine and Rehab, we often incorporate it into treatment plans alongside chiropractic adjustments to ensure lasting spinal alignment and provide patients with an effective tool for at-home care.
How to Perform the Prone Hip Flexor Stretch
- Starting Position: Kneel on a soft surface or mat. Place a cushion under your back knee for comfort if needed.
- Lunge Forward: Step your right foot forward, creating a 90-degree angle at your right knee. Your knee should be directly above your ankle.
- Engage and Press: Place your hands on your front thigh for stability. Keeping your torso upright, gently press your hips forward.
- Feel the Stretch: You should feel a stretch in the front of your left hip and thigh. Hold this position without arching your lower back.
Clinical Insight: A common mistake is to over-arch the lower back. Instead, focus on tucking your tailbone slightly and engaging your core. This isolates the stretch in the hip flexor muscles and protects your lumbar spine.
Tips for Success
- Hold Time: Maintain the stretch for 30-45 seconds on each side.
- Modifications: If you have trouble balancing, perform the stretch next to a wall or a sturdy chair for support.
- Frequency: Aim to perform this stretch 2-3 times daily, especially after extended periods of sitting.
7. Supine Knee-to-Chest Stretch (Apanasana)
The supine knee-to-chest stretch is a gentle and highly effective technique for immediate sciatica relief. Performed while lying on your back, this stretch decompresses the lower spine and mobilizes the lumbar region without placing stress on the joints. By gently pulling one knee toward the chest, you relieve tension in the posterior hip and gluteal muscles, which can contribute to sciatic nerve compression. This makes it one of the best stretches for sciatica relief during an acute flare-up.

This stretch is particularly safe and accessible, which is why we frequently recommend it at Bell District Spine and Rehab. It’s an excellent option for patients with conditions like disc herniations or spinal stenosis. We often prescribe it to residents in Cedar Park and Lago Vista as a primary pain management tool and a safe, early-stage mobility exercise.
How to Perform the Supine Knee-to-Chest Stretch
- Starting Position: Lie flat on your back on a comfortable mat. Bend both knees with your feet flat on the floor.
- Bring Knee to Chest: Gently pull your right knee toward your chest, clasping your hands either over your shin or behind your thigh.
- Extend Opposite Leg: Carefully extend your left leg straight out, keeping it relaxed on the floor.
- Hold and Breathe: Hold the stretch, breathing deeply to allow your lower back and hip to release. Avoid pulling aggressively. Switch sides and repeat.
Clinical Insight: The goal is a gentle release in the lower back and buttock. If you experience sharp pain, release the stretch. Keeping the non-stretching leg extended helps prevent the lower back from arching, protecting the lumbar discs.
Tips for Success
- Hold Time: Hold the stretch for 60 to 90 seconds on each side, focusing on deep breathing.
- Modifications: If you feel discomfort in your knee, clasp your hands behind your thigh instead of over your shin.
- Frequency: Perform this stretch 2-3 times per side, up to three times daily. It’s especially beneficial before bed.
8. Quadriceps and Iliopsoas Release (Standing Quad Stretch with Pelvic Tilt)
This advanced movement combines a traditional quad stretch with a targeted pelvic tilt, making it a powerful tool for sciatica relief. It simultaneously releases tight quadriceps and hip flexor muscles while actively correcting an anterior pelvic tilt—a common postural issue that contributes to lower back strain and sciatic nerve compression. By addressing both muscle tightness and faulty pelvic alignment, this stretch gets to the root cause of sciatica for many, especially desk workers in Cedar Park.
Unlike a standard quad stretch, this variation’s focus on postural correction makes it a clinical-grade exercise. At Bell District Spine and Rehab, we teach this technique to patients after a movement analysis reveals an anterior pelvic tilt is contributing to their symptoms, such as neck pain, back pain, or headaches.
How to Perform the Quadriceps and Iliopsoas Release
- Starting Position: Stand tall next to a wall or chair for balance. Shift your weight onto your left foot.
- Leg Placement: Bend your right knee and grab your right ankle with your right hand. Gently pull your heel toward your glute.
- The Pelvic Tilt: This is the key step. While holding the stretch, actively tuck your tailbone under, as if trying to point your belt buckle up. You should feel your glutes engage and the stretch intensify in the front of your thigh and hip.
- Hold and Breathe: Keep your back straight and avoid arching. Hold this position, focusing on maintaining the pelvic tuck.
Clinical Insight: The magic of this stretch is in the pelvic tilt. Without it, you are only stretching the quadriceps. By adding the tilt, you also lengthen the hip flexors and correct the postural fault that often underlies the problem.
Tips for Success
- Hold Time: Aim for a 30 to 45-second hold on each side.
- Modifications: If you can’t reach your foot, loop a towel around your ankle to gently guide your heel toward you.
- Frequency: Perform this stretch 1-2 times daily, particularly after long periods of sitting.
Comparison of 8 Sciatica-Relief Stretches
| Technique | Implementation complexity | Resource requirements | Expected outcomes | Ideal use cases | Key advantages |
|---|---|---|---|---|---|
| Pigeon Pose (Eka Kapotasana) | Medium — requires hip flexibility and proper form; risk of knee strain if done incorrectly | Yoga mat; optional block/cushion; modifiable for home practice | Deep piriformis/hip release; many report relief within 30–60s; improves long-term hip mobility | Piriformis-related sciatica, flexible patients, yoga practitioners, desk workers with hip tightness | Directly targets piriformis; modifiable; no special equipment |
| Figure-4 Stretch (Supine Piriformis Stretch) | Low — simple supine technique, easy to learn and control | Mat or padded surface; minimal props | Gentle piriformis engagement; spinal-friendly relief; can be held 60–90s | Acute sciatica, seniors, limited mobility, post-surgical patients | Low spinal load; safe for disc issues; effective for piriformis |
| Hamstring Stretch (Standing or Seated) | Low–Medium — variation-dependent; standing requires balance | Chair or mat; strap/towel optional | Reduces posterior-chain tension and referred pain; improves posture; requires consistency for lasting effect | Desk workers, athletes, commuters, those with tight posterior chain | Highly accessible; prevents recurrence; complements other therapies |
| Sciatic Nerve Flossing (Nerve Gliding) | High — requires instruction and neurodynamic understanding; technique-sensitive | Professional guidance recommended; minimal equipment | Improves neural mobility and reduces adhesions; can relieve when static stretches fail; variable results | Nerve entrapment, post-inflammatory sensitivity, chronic sciatica under clinician supervision | Directly targets nerve mobility; enhances neurodynamics; effective adjunct to decompression |
| Seated Spinal Twist (Sukhasan Twist) | Low — gentle rotation, easy to perform in various settings | Chair or yoga block; minimal space | Improves spinal rotational mobility and mild decompression; temporary symptom relief with regular use | Desk workers, posture-related sciatica, seniors, office breaks | Office-friendly; safe for many; combines spinal and hip mobility |
| Prone Hip Flexor Stretch (Modified Lunge) | Low–Medium — requires hip-extension control and some balance | Mat/knee pad; chair or wall for balance optional | Reduces anterior pelvic tilt over time; improves lumbar alignment and posture | Sedentary individuals, office workers with anterior pelvic tilt, athletes | Targets postural root causes; improves spinal alignment; preventive |
| Supine Knee-to-Chest Stretch (Apanasana) | Low — very safe and simple to perform | Mat or padded surface | Gentle lumbar decompression and posterior hip release; immediate relief for many; suitable for prolonged holds | Disc herniation, spinal stenosis, acute sciatica, elderly patients | Extremely safe; accessible to all fitness levels; complements decompression therapy |
| Quadriceps & Iliopsoas Release (Standing Quad Stretch with Pelvic Tilt) | Medium–High — requires proprioception and deliberate pelvic control | Wall/chair for balance; minimal equipment | Corrects anterior pelvic tilt and improves neuromuscular control; lasting postural benefits with consistency | Chronic postural sciatica, confirmed anterior pelvic tilt, patients in postural retraining | Simultaneous muscle lengthening and postural correction; teaches self-correction |
When Stretches Aren’t Enough: Your Next Step with Your Cedar Park Chiropractor
Consistently performing these stretches is a significant step toward managing your sciatic pain. By targeting the piriformis, hamstrings, and hip flexors, you can improve mobility and reduce nerve compression. Remember, the goal is to gently encourage your body toward greater ease and flexibility, not to push through sharp pain. These exercises are your foundational tools for daily management and long-term spinal health.
However, stretching is often just one piece of the recovery puzzle. If your pain persists, or if you experience numbness, tingling, or weakness in your leg, it’s a clear signal that your body needs professional support. These symptoms can indicate a more significant issue like a herniated disc, spinal stenosis, or an auto injury, which requires a professional diagnosis to prevent further damage.
The Importance of a Professional Diagnosis in Cedar Park
Relying on stretching alone without a proper diagnosis is like trying to navigate the roads of Leander and North Austin without a map—you might get lost. An accurate diagnosis from a qualified chiropractor is the most direct route to effective relief. At Bell District Spine and Rehab, we use a detailed diagnostic process to pinpoint the exact source of your sciatic nerve irritation. This allows us to create a precise treatment plan that moves beyond temporary symptom management.
We often find that factors outside of your stretching routine impact your recovery. Poor posture at a desk can continuously aggravate the sciatic nerve. Your sleep environment also plays a critical role. When stretches aren’t enough, evaluating your sleep setup, such as finding the best mattress topper for back pain, can be a crucial next step.
A Personalized Path to Lasting Sciatica Relief in Cedar Park, TX
At our Cedar Park clinic, we believe the best approach to sciatica relief combines targeted manual therapies with empowering patient education. Our chiropractic care plan may include:
- Specific Chiropractic Adjustments: To restore proper motion to spinal joints and relieve pressure on the nerve.
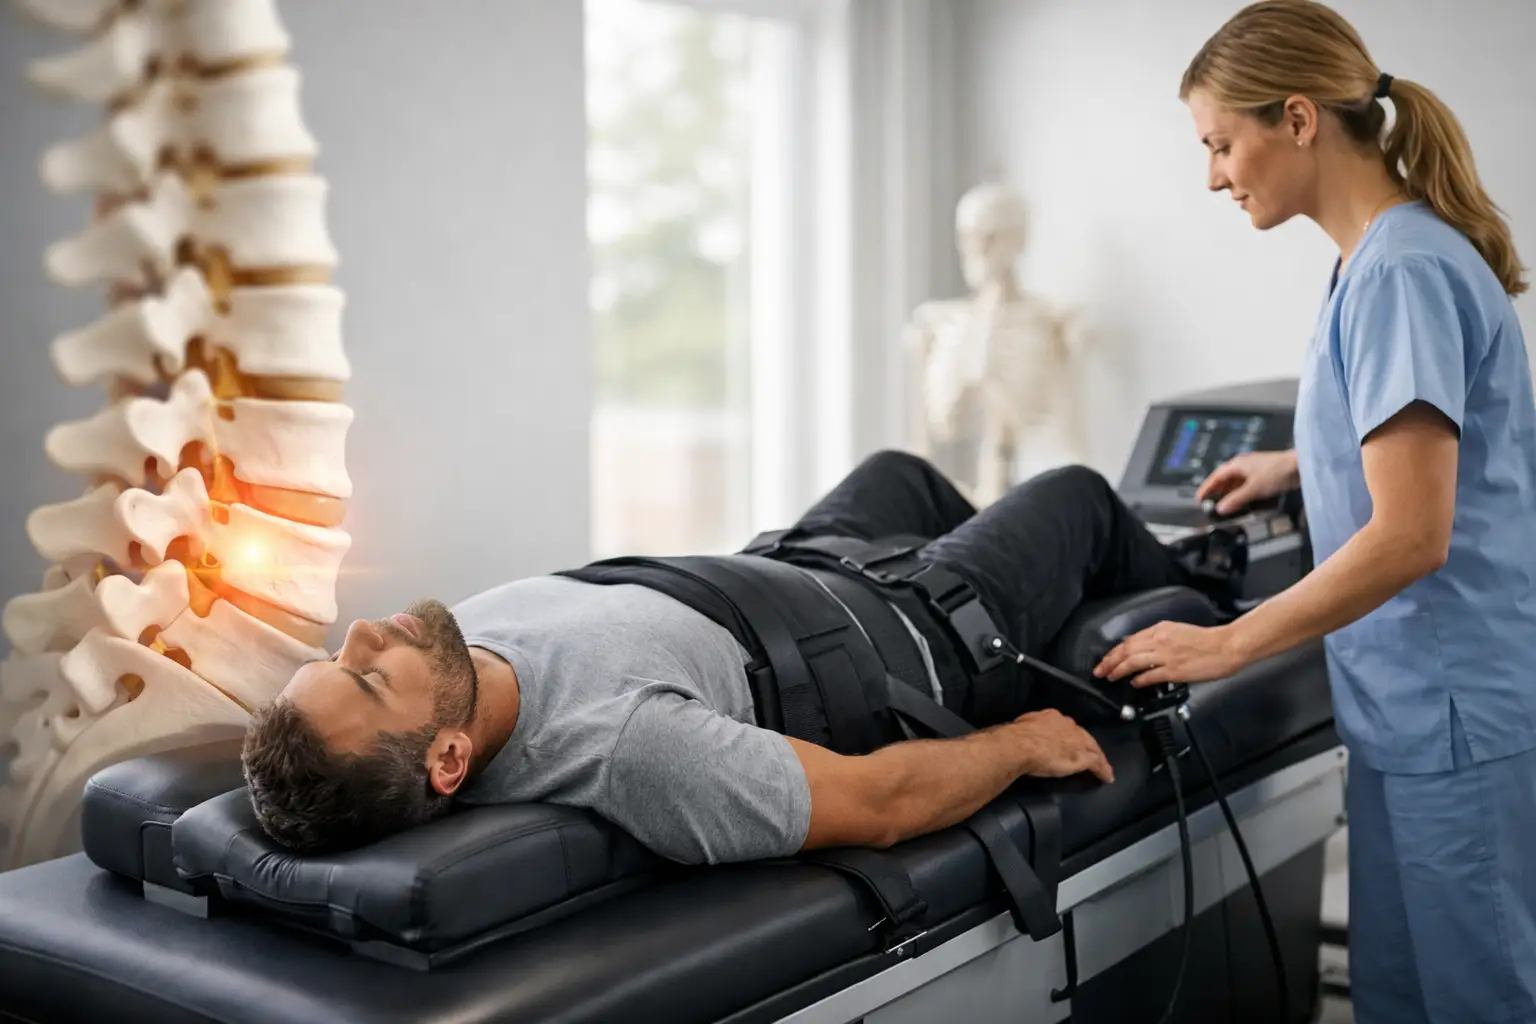
- Spinal Decompression: A gentle therapy to alleviate pressure on herniated or bulging discs.
- Soft Tissue Techniques: To release tension in the piriformis, glutes, and other muscles compressing the sciatic nerve.
- Laser Therapy: To reduce inflammation and accelerate tissue healing.
This multi-faceted strategy ensures we address the issue from every angle, giving you the best chance for a full and lasting recovery. Don’t let sciatic pain dictate your life or keep you from enjoying all that our Cedar Park community has to offer. The knowledge you’ve gained about the best stretches for sciatica relief is a powerful starting point, and combining it with expert chiropractic care is your next step toward a pain-free future.
Ready to find a lasting solution for your sciatica? The team at Bell District Spine and Rehab is here to provide an accurate diagnosis and create a personalized treatment plan for you. Visit Bell District Spine and Rehab or call our Cedar Park office today to schedule your consultation and take the first step toward reclaiming your life from pain.